This articles help users on how to use the application of Notion for taking notes for time optimizing and organization of ideas. We’ll discuss why Notion can help you improve your work flow as you maintain it, how it can save you hours of work and how to make your own note-taking system in Notion
What is notion?
Notion is a software developed for proyect management and note taking. Although right now, Notion is used for more than just those two. The most common examples on how people use notion besides proyect management and note taking could be: goal tracker, student dashboards, grocery lists, business management, journals or any kind of tracker. It is an easy software that non programers can understand and modify depending on their needs and necesities.
Why use Notion?
There are a lot of advantages of using Notion as your main note taking application. The main one is that the free version of Notion is very well set up with a lot of tools and widgets available to use. Also, the amount of notes that you can keep on Notion are almost limitless, you can go on your 4 years of bacheleor degree without running out of space, which makes Notion a safe space where you can keep your most important notes completely safe and available any time. As a student, I use Notion for the efficiency it provides and because I can take advantage of all of the available tools to make my studying process less time consuming. Notion is one of the reasons I’ve been getting straight A’s while having a part-time job and a blog.
How to start Notetaking with Notion
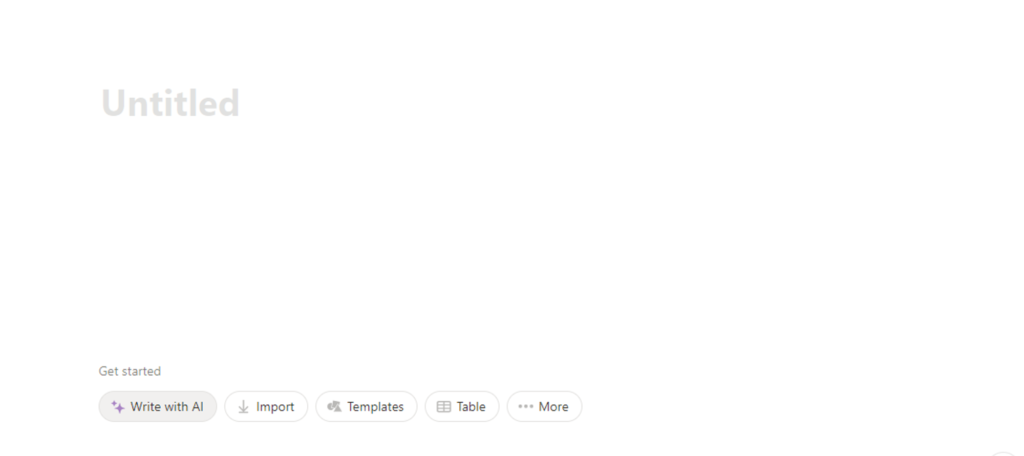
If you’re completely new in Notion, you’ll need to make an account and create a blank document and add a new page.
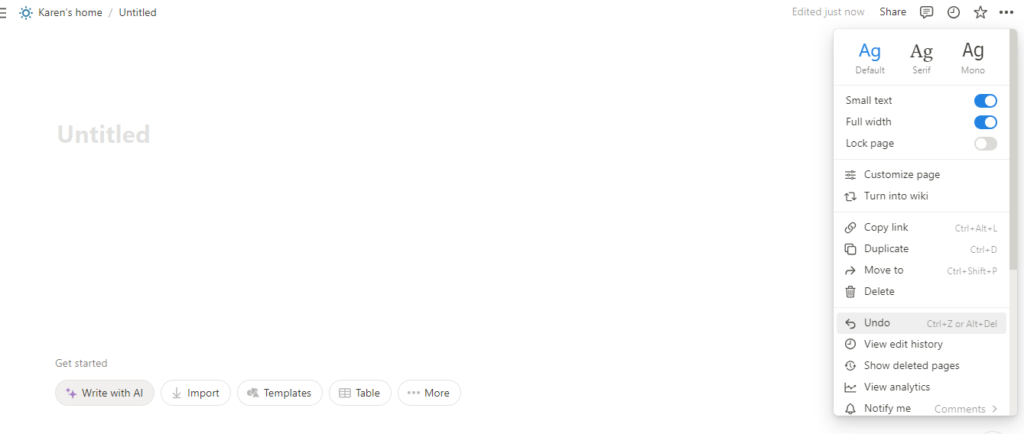
What I usually try to do first, is edit the page settings. This available on the right top corner of your page where there is the three dots. Here you’ll activate the small text and full width.
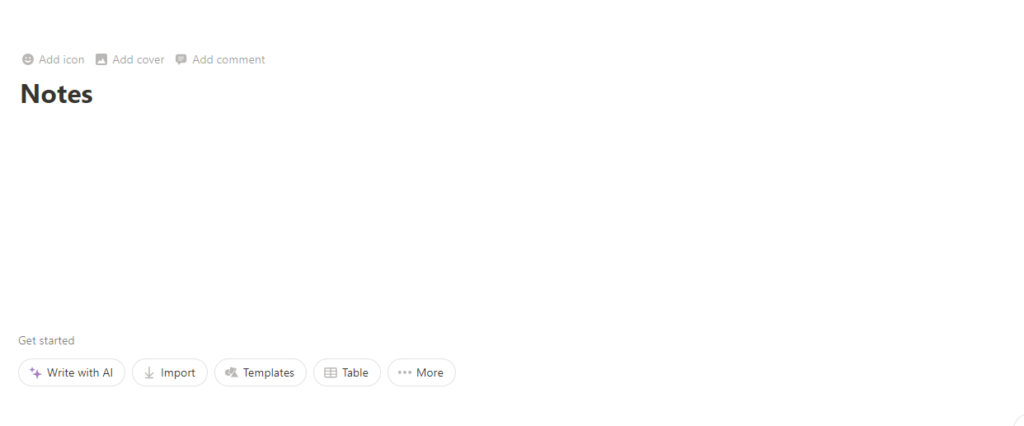
We’ll start by adding a name to our note taking system. You can name it however you want, for this example, I’ll just name it notes.
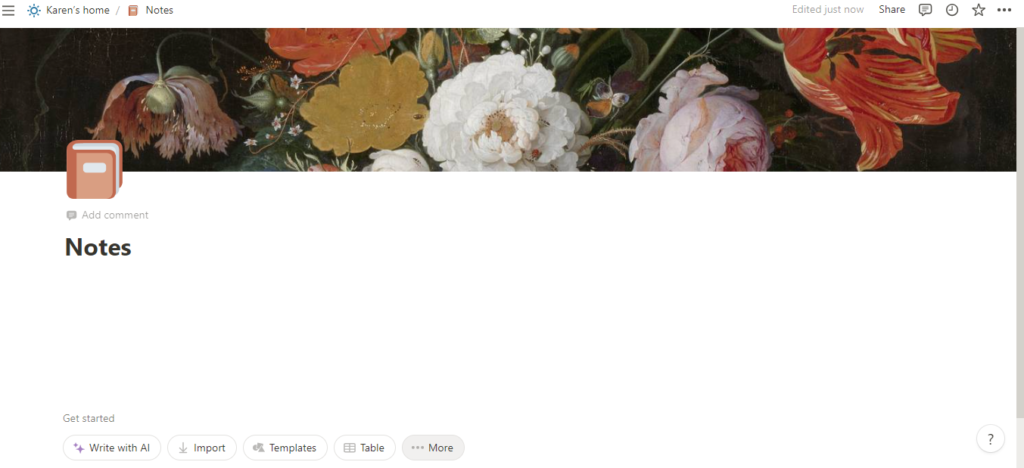
If you want, for design purposes you can add an icon and a cover. For this you can choose the options that Notion offers or you can add your own images.
Next, we will make a table view for our Note Taking system. If you’re in a computer, you can add a table view by writing / tableview and pressing enter
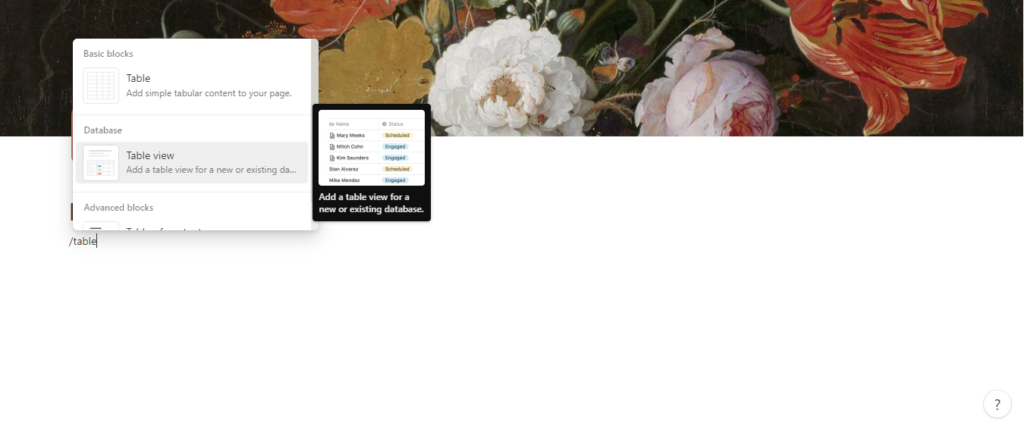
Since we don’t have a database yet we’ll just choose the option of New Data base, this is how our table should look like:
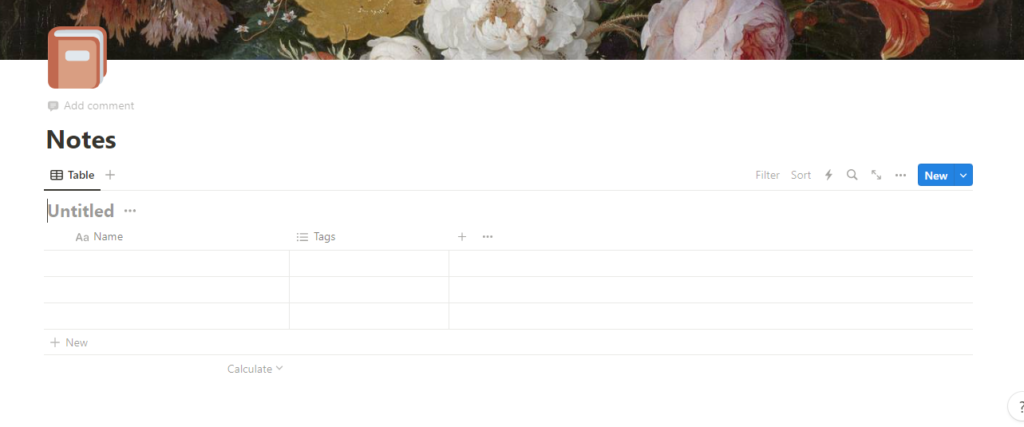
You can name your notes however you want but right now we’ll focus on making the rows for our table, this is how we’ll be able to organize our notes. What we’ll edit is the propeties of our table. This are the ones that can help us organize the information that we put. We’ll leave the first property of Name the same and we’ll start working in the Tags property. This part depends a lot of how you want to organize your notes but in a general aspect we’ll organize notes by: the date they were created, what class or topic is it related to, the status of our notes, priority notes, type of note, resources and links.
In the Tags property you’ll want to change the name to “class” or “subject” or “topic”
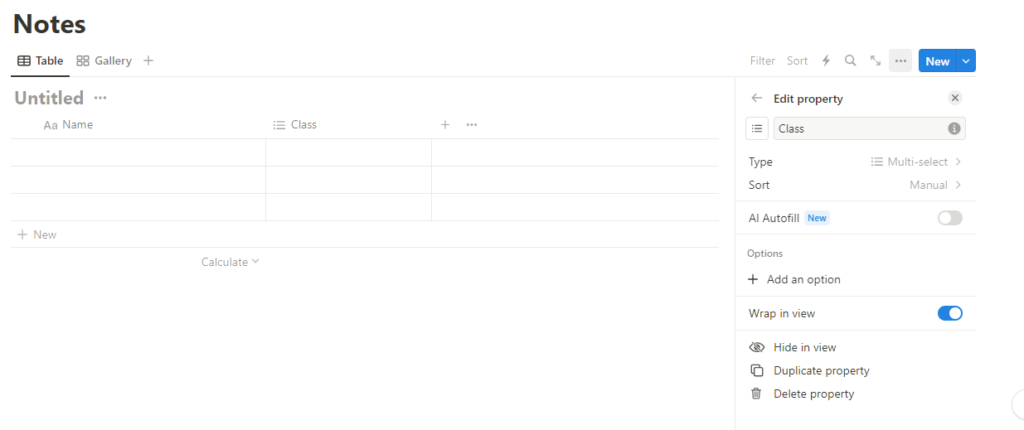
When you click on the tag property you can change the name and if you click edit property it should display a menu that will let us modify the property for adding classes click on add an option and make sure to add all your classes.
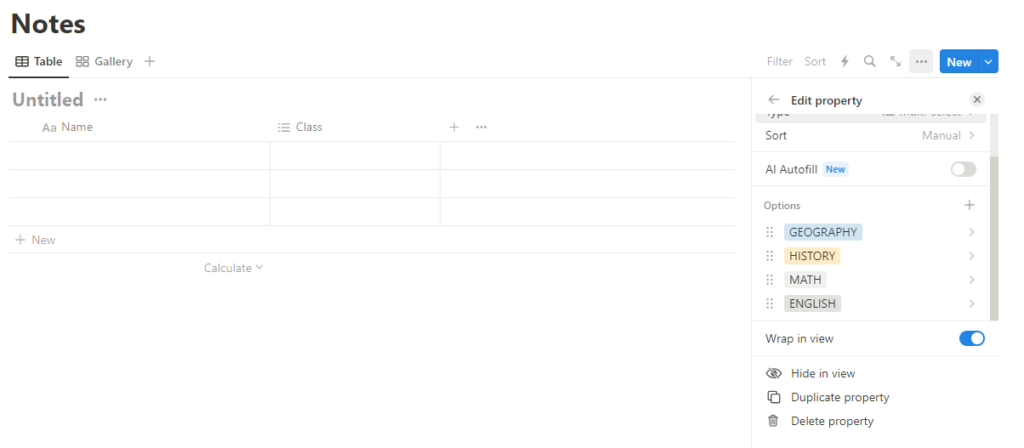
Your options can look something like that. You can also change the icon for the class for whatever you want by clicking the icon. Next to the class property, we’ll click on the plus to create a new property and we’ll add a date property and change the name to “Date published”
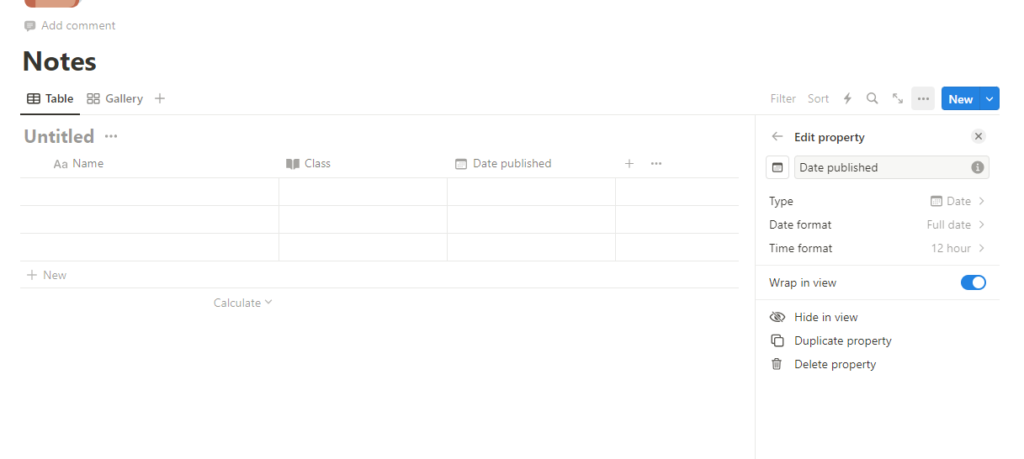
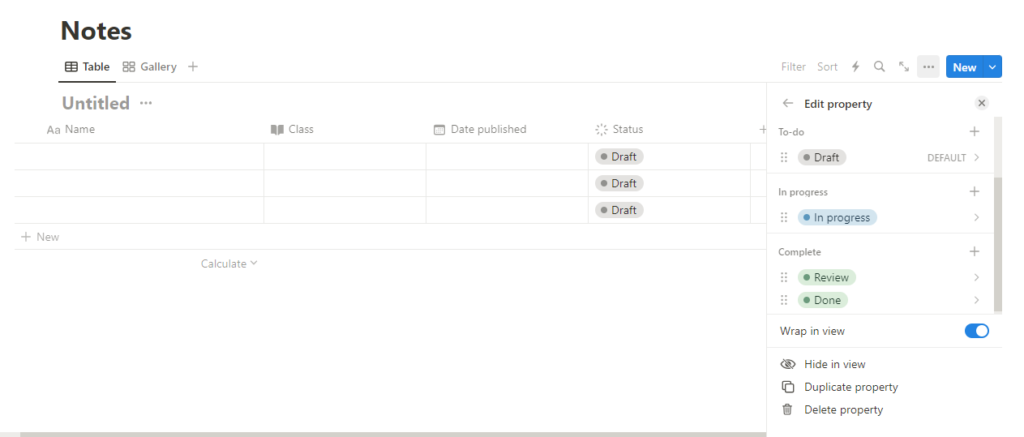
Now we’ll make the status of our notes. This will remind us if the note we’re reviewing it’s finished, in process, a draft or if you’re just reviewing it. Add a new property and look for the status property. It shows you options for status you can use, you can decide to use those or edit your own. I’ll switch Not Started for Draft and add a Review property
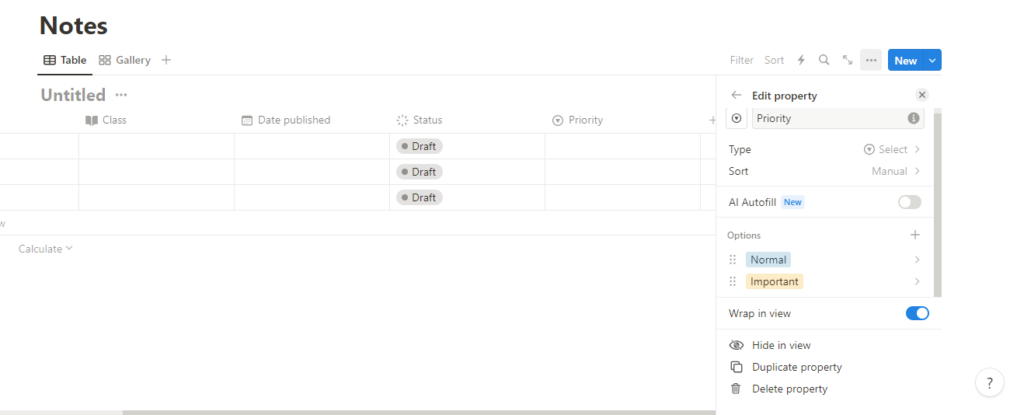
Next is priority notes, we’ll use this property for filtering our most important notes, for this we’ll use a select property and we’ll set the options to important and normal
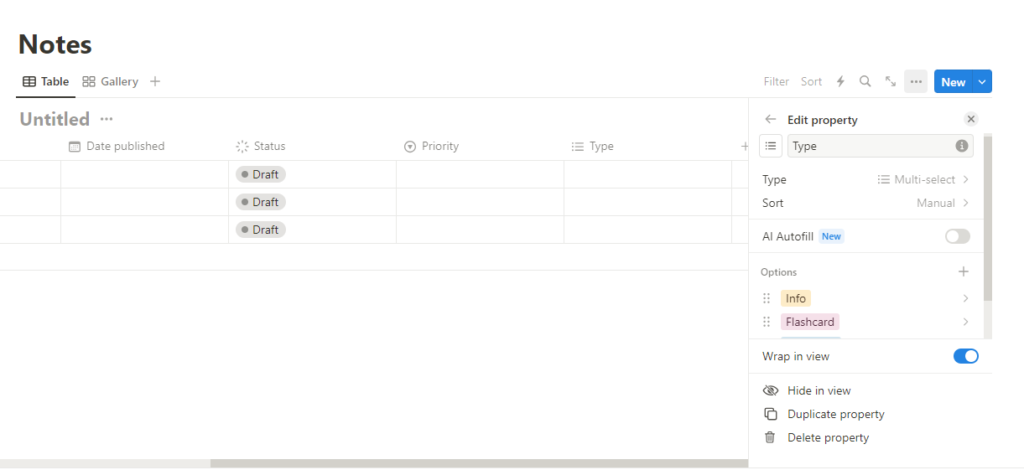
Now we’ll do the type of note. This means that we can devide our notes into the purpose of the note like: sumarizer, mindmap, flash cards. This one we can use the multi-select
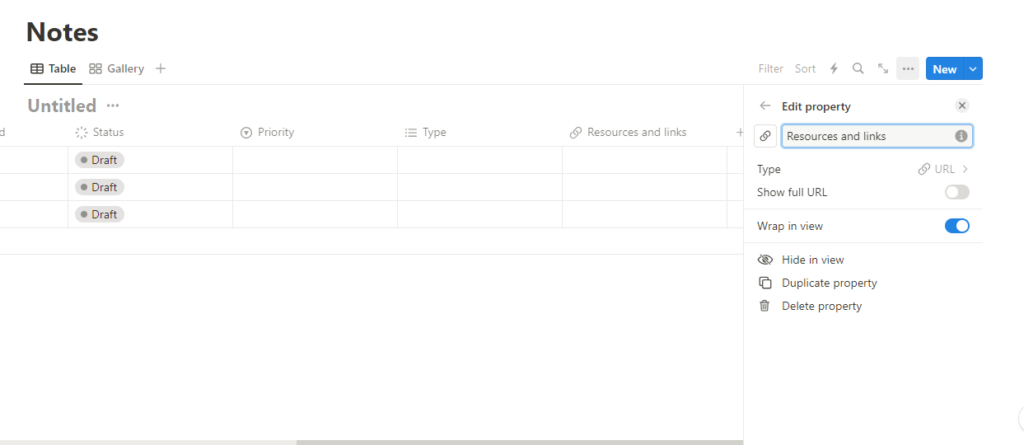
To finsh our table we’ll add a property for our resources and links, here you can link to any external information that will add to your note in case you need it. You can use it for adding your class Power Point presentation, external websites, lectures, pdf documents and anything you can get a link of. We’ll ise the property of URL and change the name to “Resources and links” Try coping and pasting a link to confirm it works.
So right now we have our table complete, here is a version of the table with information on it so you can see how it would look once you start filling it up.
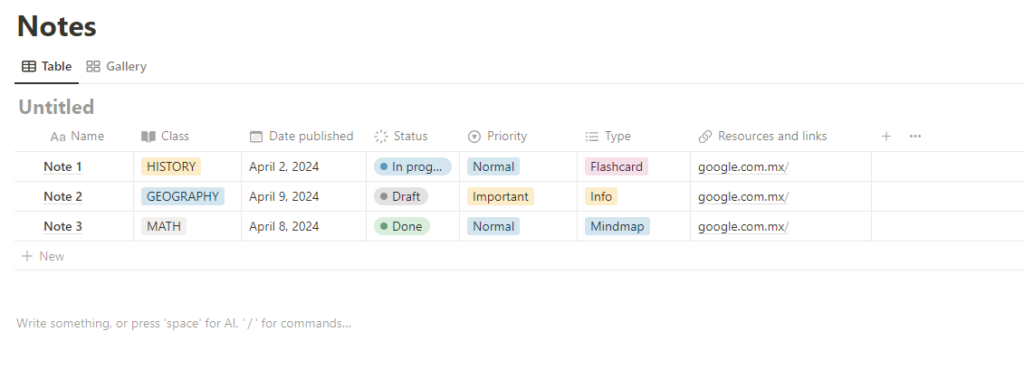
Now we’re going to focus on the design and filters, the first thing is that we are going to not show the title of our table because we already know from the title that these are our notes. Where it says untitled click the three buttons on the right and select hide database title.
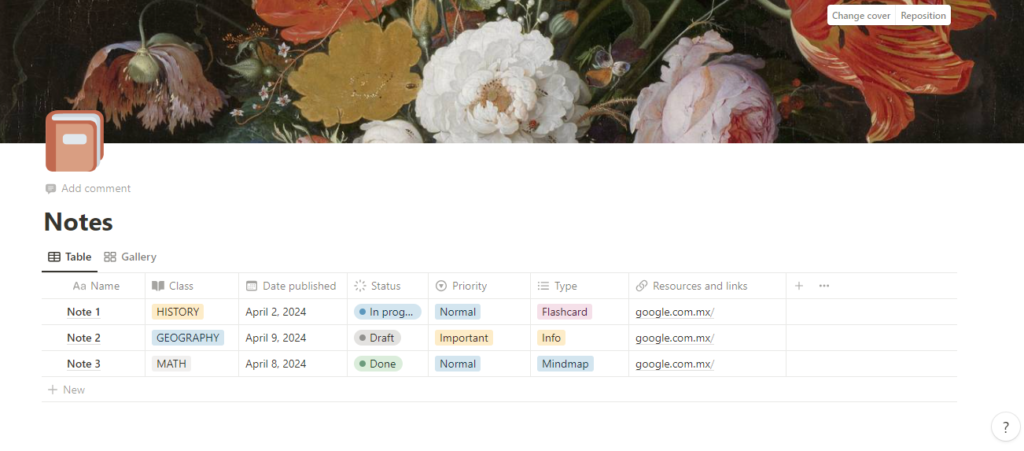
Now you’ll see that on the table at the right corner there is a blue button called New and a arrow down, make sure you’re clicking the arrow down and not the New button.

Click on where it says add New template. Once the new template is showing you’re going to click on the property of date published where it says empty
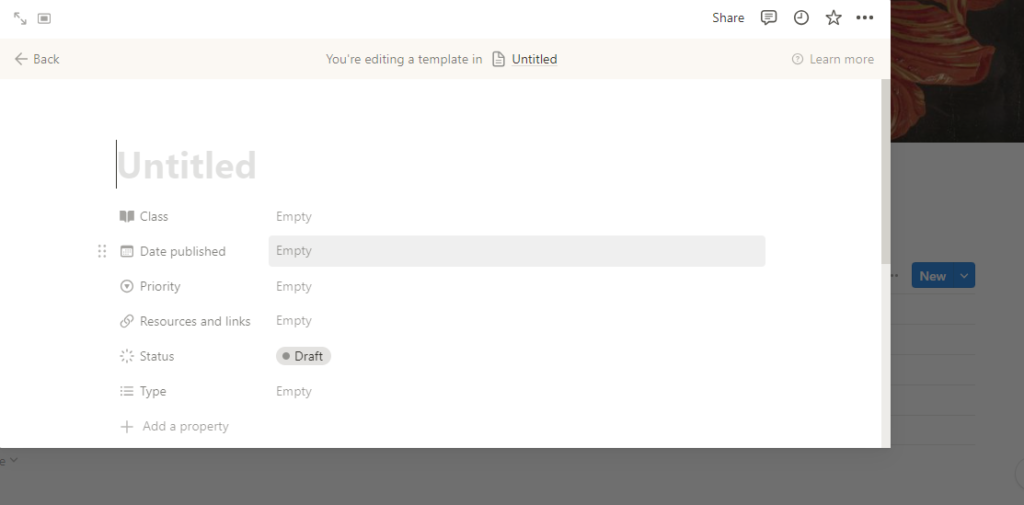
It should display the date property like this:
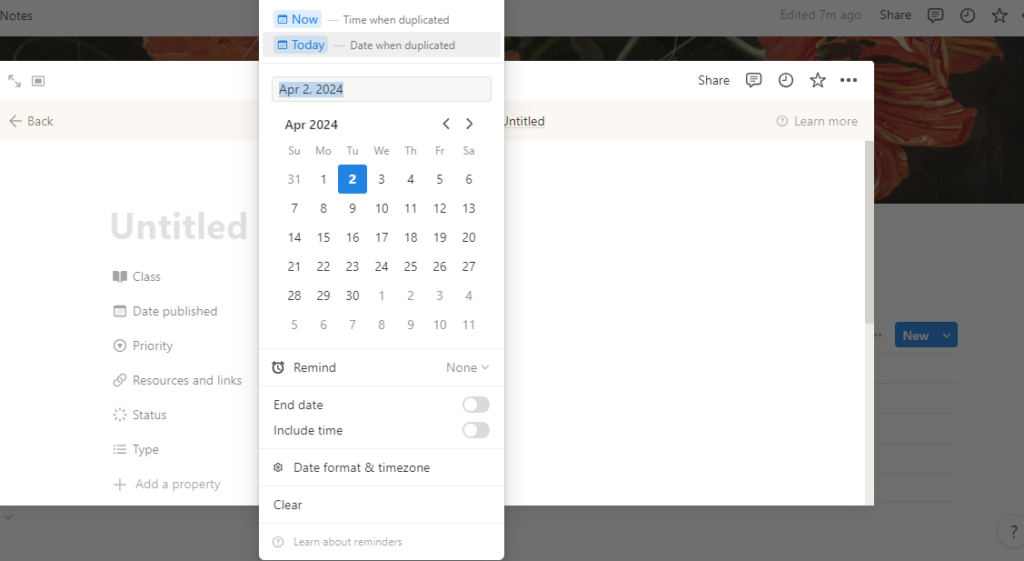
And you’re going to click on the top where it says today, you can now close the new temple. We’re going to click on the arrow looking down once more and then on the three dots on the side of the option for the template we just made. It should display a text saying “set as default”

Click on for all views. With doing this, everytime that you add a new note, Notion is going to automatically display Today’s date in the property of date publsihed so you don’t have to add it everytime you make a new one.
Right now our notes would be finished but you probably want to only see the notes for a specific class so here’s what we’re going to do. Underneath our note table you’re going to write /galleryview and click on it then select new database.

If you don’t have set like this, you can go to the three dots at the top, click layout and this is how your layout should be configured.
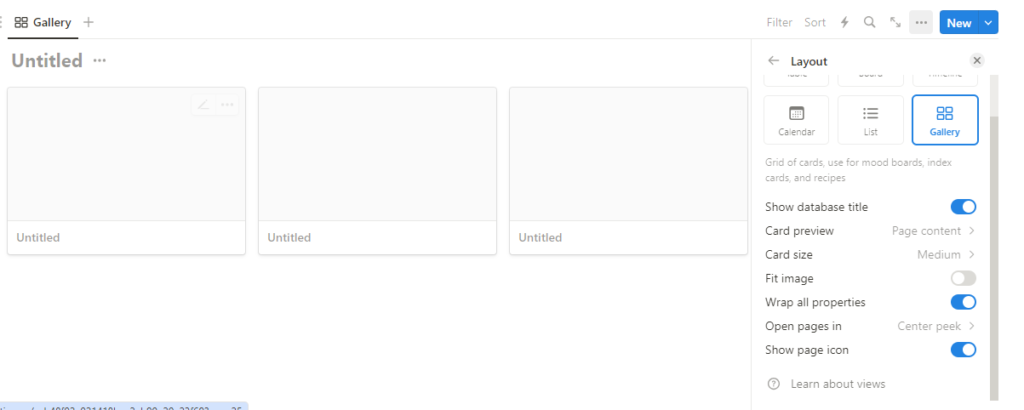
Then click on one of the card to open the properties of it.
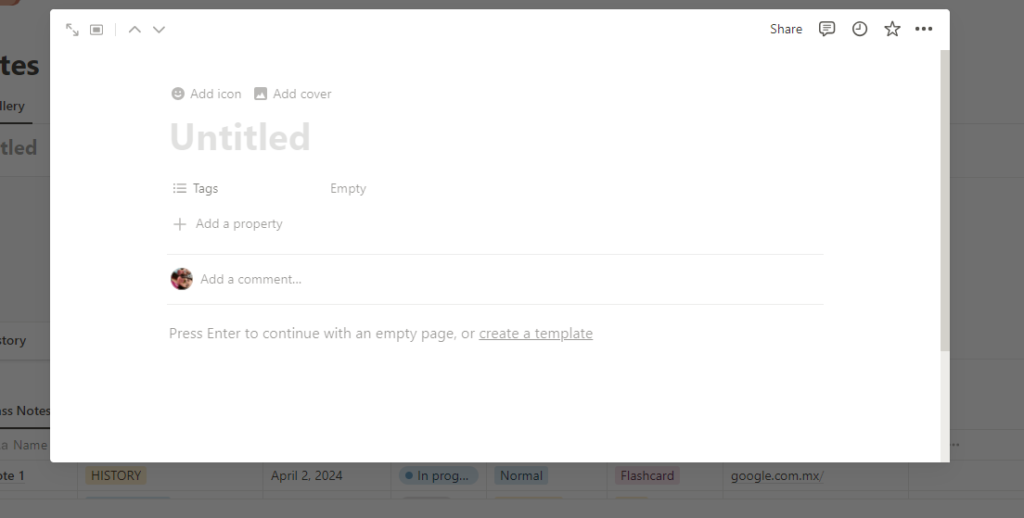
On “Untitled” Add the name of your classes like we did in the other table, for now just ignore everything else. Remember you can also add icons to every subject. It should look like this:
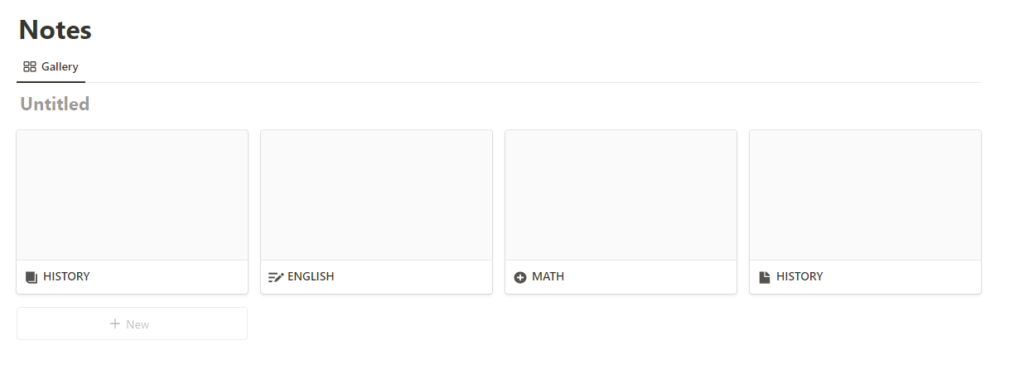
Now, we are opening one of the cards again and where it says “Press Enter to continue..” you’re going to write /linked view of database and the option should appear in your screen.
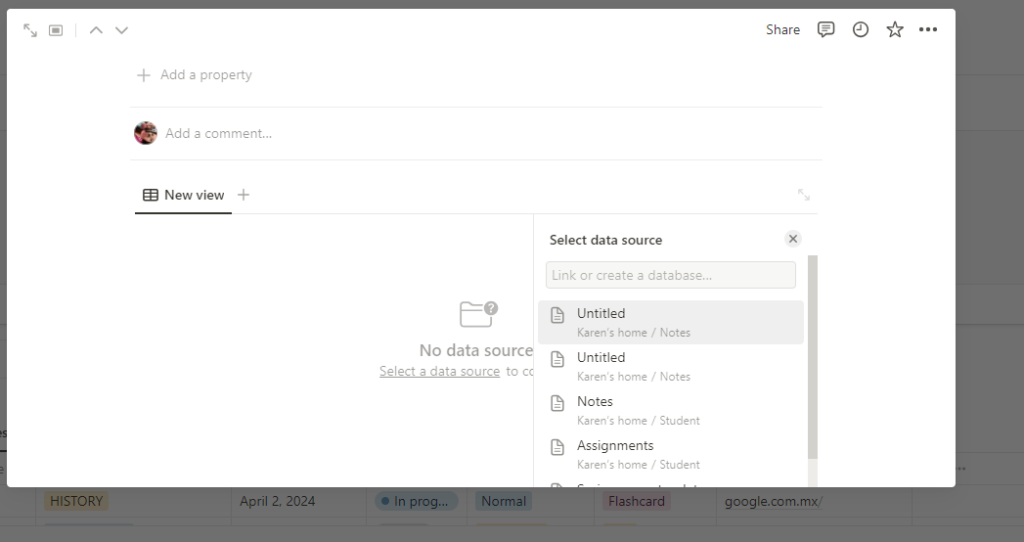
Since we didn’t name our notes table it should show you this table under the name of “untitled” make sure to select the notes table. If you hd made other tables in Notion keep on mind they’re going to show up as well.
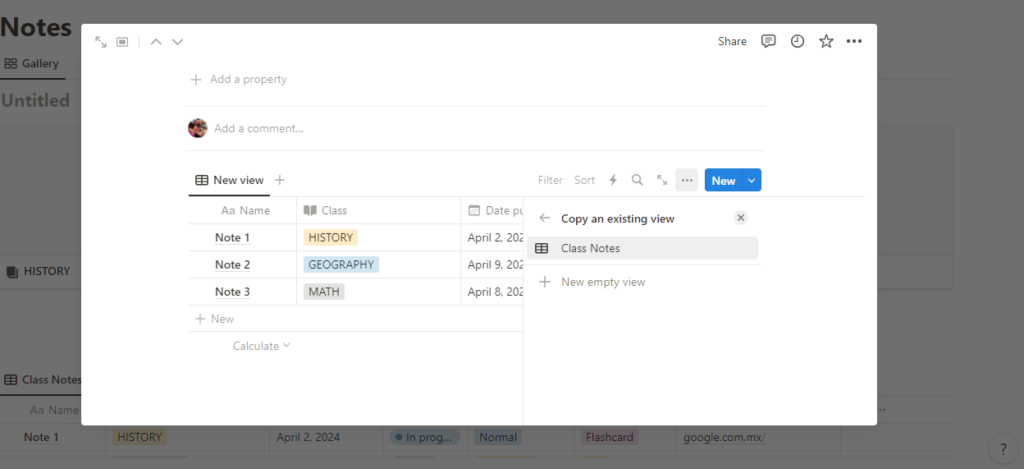
Click on Class Notes and you’re notes are copied to your specific class or topic. But right now, the notes from all clases are showing in a specific class. In this case I’m in the English class and I can still see notes from the history, geography and math. So we need to filter our notes to only show the notes from the English class. On the top right of the Notes there is the option called “Filter” we’re going to click on it then select class and then just select the class your card is about.
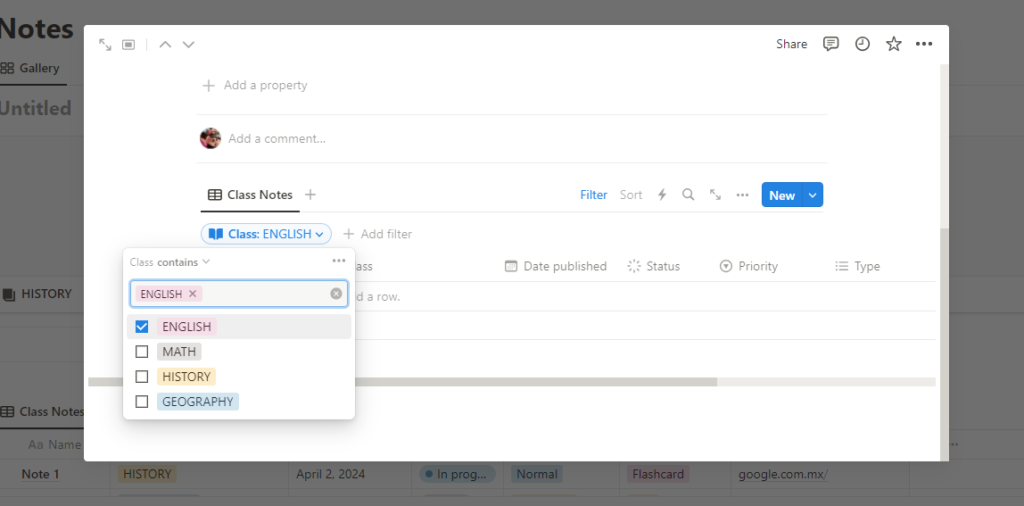
You’ll do this step for every class. We are complete with our notes page, remember you can always add images, videos and extra elements to make your page better looking. If you’re looking for adding images to your gallery view of your classes you’ll have to add a cover for each class and then in the three dots at the top right click on Layout and activate the option of show page icon.
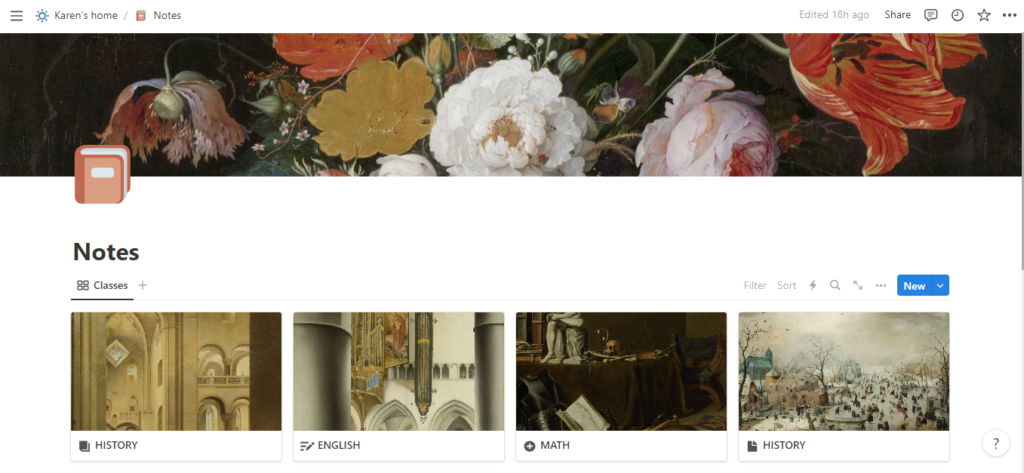
Template
I’ll leave the template we just created here for you to download it completley for free, let me know if you’ll like more tutorials from Notion and if you used and how did you edit it.
https://dent-beluga-86d.notion.site/Notes-1-f9a374b570ec4286ac71e5e4de8df5cb?pvs=4
